The equipment used in the New Forest Observatory has changed quite a lot since the first Hyperstar images were produced back in November 2004.
In the Beginning
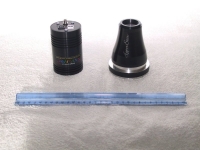
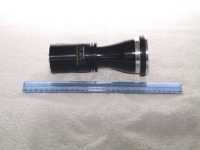
From November 2004 until August 2006 I used a lens attachment called a Hyperstar from Starizona on my Celestron Nexstar 11 GPS (purchased from David Hinds), together with a Starlight Xpress SXV-H9C one-shot colour CCD. The Hyperstar and CCD can be seen below.
The Hyperstar is a remarkable piece of optical engineering, and the original Fastar was an extremely brave move by the innovative Celestron. The Hyperstar lens takes the place of the secondary mirror on a Schmidt-Cassegrain type scope, and it converts the native f#10 11″ GPS into an extremely fast f#1.85 instrument. Not only does this make the imaging system very fast, it also gives a very nice wide field of view of one-degree by three-quarters of a degree with an SXV-H9C camera.
Other advantages of very fast imaging optics are very short sub-exposures. Short sub-exposures mean:
- Your mount tracking doesn’t have to be super great.
- You aren’t too upset when you lose a single sub to a plane, satellite, or bumping the scope.
- You can get a large number of subs in a single imaging session leading to a very low noise final image.
There are of course downsides.
- It is very difficult to get rid of all traces of coma, especially in the far corners of your image, when using a “fast” optical system.
- The depth of focus is only 7 microns, where the diameter of a human hair is roughly 80 microns. This not only makes focussing very difficult, it also means that your optics have to be precisely aligned to be able to get nice round stars in your final image, i.e. the collimation is tough.
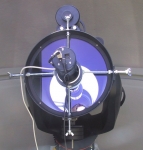
It was the need to precisely align the Hyperstar that led me to taking a drill to my beloved scope and fitting these threaded adjuster bars that you see in the Figure below.
These adjusters allowed me to precisely position the Hyperstar in the corrector plate leading to very good optical collimation of the system.
Short focal length refractor imaging
From September 2006 – June 2008, I used a combination of a Takahashi Sky 90 f#4.5 refractor from True Technology and large format SXVF-M25C one-shot colour CCD from Starlight Xpress.
A reducer/corrector lens element fitted to the Sky 90 gives a very flat imaging field (necessary when using large format cameras) and nicely speeds the optics up to f#4.5, not as good as the Hyperstar by a long shot, but certainly adequate. The huge bonus you get moving to this type of imager is not only a big field of view, 3.33 by 2.22 degrees, but also pin sharp round stars from corner to corner.
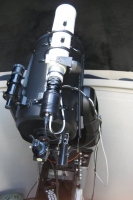
The Sky 90/M25C combination is seen in the image at the top/left of this section. It sits piggy-back on top of the 11″ GPS reflector which is now used in the role of a guide scope!
Do I gain anything apart from high-quality stars across the field of view [FOV] with this imager? Yes, in fact I “win” over the old Hyperstar system. The Sky 90 at f#4.5 is 6 times “slower” than the ultra-fast f#1.85 Hyperstar – but – the Sky 90/M25C field of view is 10 times the area of the 11″ GPS/Hyperstar combination.
So taking both these factors into account, I actually do slightly better overall in my imaging, with the much smaller aperture Sky 90, which at first sight seems perverse.
I would of course do even better with a larger aperture, shorter focal length refractor like the Takahashi FSQ106 with its reducer/corrector giving an astonishing f#3.6. As you can imagine – one of these beauties is next on the list!
The Hyperstar returns to the New Forest Observatory
In June 2008 I went on a business trip to Arizona and whilst over there Dean of Starizona shipped me a Hyperstar III and electronic focuser to my hotel room in Phoenix – thank you Dean 🙂 So from June 2008 – present I have returned to the world of ultra fast imaging using the amazing Hyperstar lens assembly. It’s a joy to once again have the speed that only an f#2 ratio can give you on an 11″ aperture. The only downside I am encountering as I hunt for more difficult targets is the bad light pollution afforded by the urban New Forest – it has got progressively worse over the past 5 years 🙁 I cannot image the supernova remnant CTB1 in Cassiopeia from my current location and we are actively looking for a new house (with a bit more land) in an area with darker skies. Fortunately we don’t need to move too many miles away to find much darker skies.
The mini-WASP array
The next big project for the New Forest Observatory is the construction of a “mini-WASP” array, along the lines of the professional “super-WASP” arrays that are used for hunting exo-planets. The mini-WASP array will use Sky 90s and FSQ106 refractors together with SXVF-M25C one-shot colour CCDs and H35 large format mono CCDs. The mini-WASP will allow large-field, high(ish) resolution imaging, plus getting more image data (by parallel imaging the same object) in one imaging session. We get so few good imaging hours in the year that it is necessary to grab as much good data as we can get during these rare times – hence parallel imaging [c/f parallel processing].
The mini-WASP array will need a professional quality mount, almost certainly the Paramount ME, a new observatory dome [the current Pulsar 7 foot dome won’t accommodate the array] and a rigid framework to hold the refractor array. A local precision engineering firm NTE Poole has fabricated the all-aluminium framework for the array, they also made an earlier all-aluminium alt-az mode pier for me as well. NTE Poole are rare experts in precision aluminium welding work, something that they put to good use in creating large UHV systems for the semiconductor industry.
It is November 2013 and the mini-WASP array has been fully functional for a year now. The whole philosophy behind constructing the array was to get down 3x as much data in the same time a single imager grabs its data. In that respect the array has fully met all expectations. With a typical 4-hour imaging session in a single evening I now get 12-hours worth of data. A very good quality image requires around 8-hours of good data, so instead of taking up two evening’s worth of imaging time to get a high quality image – I can now get it all done in a single evening – which was the whole point of the project. We get so few good clear Moonless evenings in the U.K. that I simply couldn’t afford to use two (or even 3) of them up just to capture a single object – it was too inefficient. In that respect the array has revolutionised my deep-sky imaging. The array however is “slow” compared to the Hyperstar III, so although the array is perfect for stars and star fields, it requires a long total imaging time to grab the faint nebulosity. However, as the Hyperstar III is better for that job it makes sense to grab the starfield data relatively quickly with the mini-WASP array, and then fill in any faint detail with the Hyperstar III. I have done this with a few images and it seems to work extremely well.


