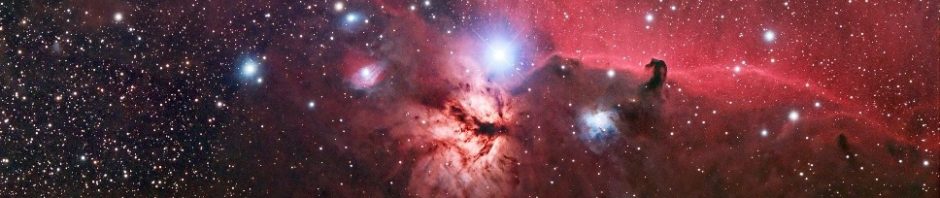
I said I wouldn’t divulge the secret if the result was good. As the result wasn’t particularly good, I’ll tell you how it was done. The ultra-fast Hyperstar 4 at f#2 will blow the core of M42 (the Trapezium region) with anything over 1-second exposures. I suppose you could use even shorter exposures, but then you would be adding more camera noise to the image as well as having the poor SNR of a short exposure. So my idea was to take longer exposures, to get away from the camera noise, by reducing the luminosity of the core region. But how can you do that? I was given the idea over 17 years ago when I was visually observing the core region with the C11 at its native f#10. I couldn’t see the Trapezium stars of course, as the region was just too bright – but then a cloud drifted across M42, and just for a moment I saw the Trapezium stars, very clearly. So there was the clue. To mimic the cloud I bought a Neutral Density Filter (10 stops) and it certainly did a great job in cutting down the luminosity, but the resulting image at f#2 is a bit disappointing as the region takes up too little space in the whole field of view. So although the idea works, in principle, it’s not the best way to image this one.
Pages
Gallery

Categories
- Hyperstar III and Trius SX-814C
- Uncategorized
- Macrophotography
- Carbon Stars
- Picture of the Week
- High-Speed Photography
- Photomicroscopy
- Talks and Presentations
- Photographic courses
- Hyperstar III and SXVF-M26C
- Canon 200mm prime lens
- Astronomy Image of the Day
- Exhibitions
- CCD Images
- Published Work
- Site News
- Writing
- News
- Creating mosaics
- Star Vistas
- House and home
Visitors
Admin
Tags
