In my opinion the Hyperstar 4 is a most amazing piece of kit, and it is beyond me why anyone entering astrophotography for the first time wouldn’t consider this as their route to entry. But there is a caveat. To get high quality images out of the Hyperstar your system must be well-collimated. Now, I don’t know how much of a problem maintaining collimation is with the new “Edge” models, but with my aging C11 it is certainly not trivial. Maintaining collimation is vital for image quality and it is an ongoing and labour-intensive process, but not beyond the capabilities of your average astrophotographer. I shall go through the collimation process, and then give you a few of my “tricks” for maintaining good collimation.
The number one piece of software you MUST have in order to carry out collimation of your Hyperstar is CCDInspector. I have absolutely no idea how people collimate their telescopes (refractor, or reflector) without this software. In the case of a refractor I use CCDInspector to accurately flatten the imaging chip to the optical axis. In the case of the Hyperstar the process is slightly different.
The very first thing you must do, before you even put the Hyperstar on your telescope, is to flatten the CCD or CMOS imager chip. Larger chip cameras usually have a moveable front plate that allows you to accurately place the plane of the chip perpendicularly to the optical axis. There is a tutorial on the Starlight Xpress website that shows you how to do this. With your imaging chip flattened, and your camera fitted to the Hyperstar, we can now get on with the business of collimation.
With your camera mounted on the Hyperstar, the very first thing you need to do is get a rough collimation. To do this you use the mount to get a star (magnitude 4 or greater) placed in the center of the frame. You then deliberately move the star well out of focus to get the usual “donut” image with a dark central region and and a bright ring around the outside. You now MANUALLY change the collimation adjusters on the Hyperstar to get the dark region as well centralised as you can manage. Now focus the Hyperstar and take an image, it should already look reasonably good in the centre, but you may see issues in the corners.
The first step in fine-collimating your Hyperstar is to get a good focus. As you are repeatedly going to have to get a good focus, this is something that can only be achieved by an autofocuser, so if you don’t have one, that is your next purchase. With your autofocuser connected and running, this is the procedure. In adjusting the collimation screws you will now use a screwdriver to change collimation (NOT manual adjustment) and you will take up any slack with the push screw at the end of an adjustment.
- Get a good focus on a star field, it is a good idea to pick a star field that does not have nebulosity or galaxies in it as they might confuse CCDInspector.
- Run CCDInspector, open “Curvature” and write down in a notebook the X tilt, the Y tilt and the collimation.
- Alter one of the Hyperstar collimation adjusters and note how you have done this in the notebook.
- Autofocus again.
- Run CCDInspector and note how the X tilt and Y tilt and collimation values have changed. Your aim is to get the X tilt, Y tilt and collimation values as low as possible, 0, 0, 0 if at all possible (this may take you some time!).
- You now go through an iterative process of altering the collimation adjusters, refocusing, running CCDInspector and noting the tilt values in order to zero in on good collimation.
If you do get the magic 0, 0, 0 don’t pat yourself on the back and think the job is done – your first slew to an object is likely to throw you off the 0, 0, 0 magic numbers. Hence, if you are in the process of collimating before an imaging session, it is a good idea (if you can) to do so on the region you are about to image (so you don’t have to slew and lose collimation). If you do have to slew to your imaging object, then use a slow slew rate. That’s trick number one.
When you have finished your imaging session, leave your telescope pointing vertically upwards. Also, if possible, image your object as it approaches and passes over the zenith, that way your mirror stands more of a chance of maintaining its position and not “flopping”. Obviously if your mirror flops, you will need to re-collimate. That’s trick number two.
Every couple of months or so, run the mirror well up above and well down below focus to keep the grease evenly spread along the mirror support. That’s trick number three.
If you get to a tilt of +/- 0.1 pixels in x, and +/- 0.1 pixels in y, that will be good enough for a high-quality image, don’t kill yourself and lose all your imaging time trying to get the magic 0, 0, 0 – some nights it just doesn’t seem to happen. That’s trick number four.
When you refocus, make sure the FWHM number is where you expect it to be. If the autofocus routine has not done so well that particular time you will get confused with the readings CCDInspector comes back with. Run the autofocuser again (and again) until you get a value that looks o.k. to you. That’s trick number 5.
The depth of focus is something like 7 microns for my system, so if you consider the diameter of a human hair as something around 80 microns or so, you can see how accurately we have to place a thumping great mirror to get good focus. If you think about it too much you wonder how it is possible at all. Clearly if your focus shifts, due to a rapidly dropping temperature for instance, then your collimation shifts accordingly. So unless the temperature is stable, then you are likely to need to refocus every hour or so. In my observatory, in the winter, I nearly always need to refocus every hour. That’s trick number 6.
There’s probably a few more tricks I have, but for the moment I can’t think what they are. If I remember some more, I’ll add them on the end.
I’m not trying to put you off trying to image with a Hyperstar, far from it, the Hyperstar is the quickest way of getting high quality deep space images down to your computer. But quick, is not necessarily easy, it is not easy to get high quality images, it is most definitely an on-going process. But as I said at the beginning, none of this is beyond the capabilities of your average astrophotographer.
Happy Hyperstar imaging!!!
POSTSCRIPT: 31/07/2023
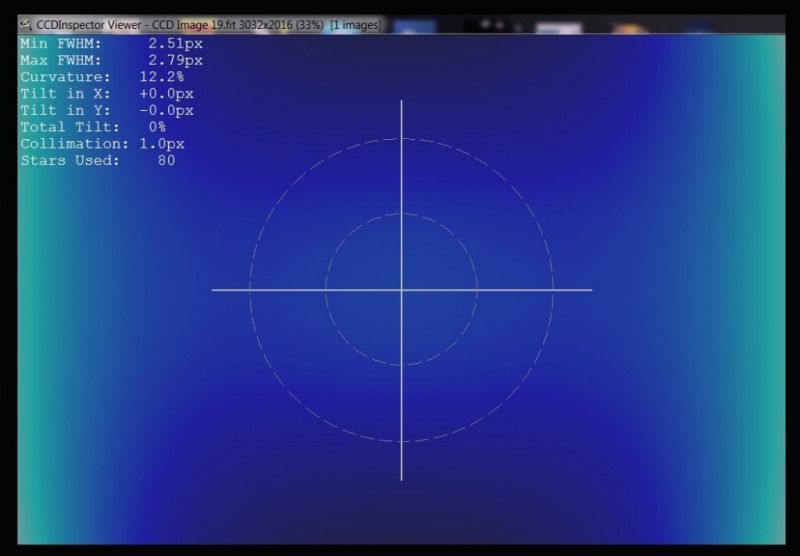
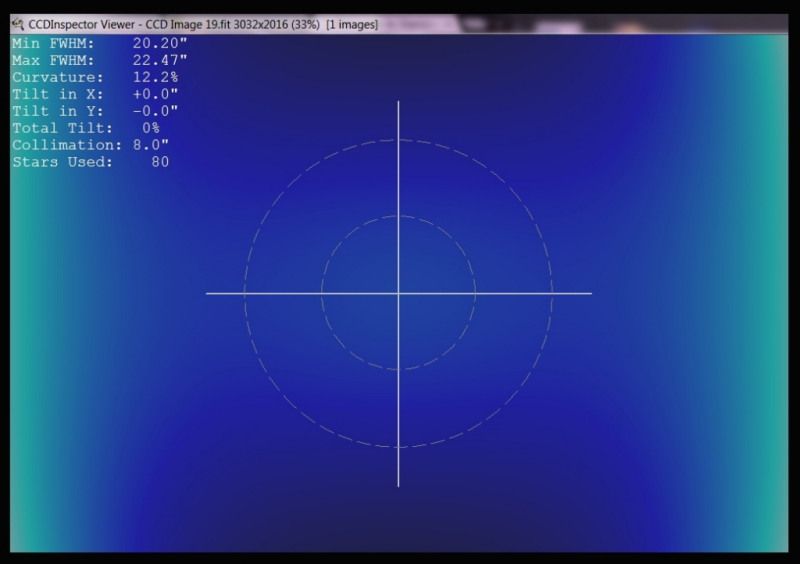
Coming back to the above on 31/07/2023 – I can’t believe I didn’t include any CCDInspector screen-shots to prove that all the stuff above isn’t just hot air. I am getting old 🙁 Anyway, here are a couple of old screenshots which were taken after collimating a Hyperstar III with an SX M25C OSC CCD attached. The method used for collimation was exactly as described above, and as you can see I didn’t go all out for the magic 0, 0, 0 – but the resulting collimation was good enough for a very nice image to be captured.
I’ve only just noticed that somehow I must have put in the wrong arc-seconds per pixel value into CCDInspector. For the M25C on the HSIII the value is 2.88 arc-seconds per pixel, so the collimation in arc-seconds should be 2.88″ – not 8″ as shown in the image.


