Hello, I’m a retired Semiconductor Physicist and I run the New Forest Observatory.
I have published over 120 refereed journal articles, more than a dozen Patents, and a textbook on Introductory Semiconductor Device Physics. An Astronomy “How to” book was published by Springer in November 2007, and a coffee-table book of deep-sky images called “Star Vistas” was published by Springer in February/March 2009. A Second Edition of “Making Beautiful Deep-Sky Images” was published by Springer in 2017.
I can clearly remember the night of Thursday 2nd May 2002 as if it were yesterday. It was the first night that I properly aligned my brand new 11″ Celestron GPS scope (purchased from David Hinds, U.K.) so that I could automatically go to all the objects I’d read about for many years – but never seen before. I wrote about the experience in a “Lateral Thoughts” article in the September 2002 issue of Physics World (IOP Publications) titled, somewhat sadly, “The most amazing two and a half hours of my life (so far)”.
Since that time even more amazing things have happened – I got a CCD camera and started deep-sky imaging. Never in my wildest dreams as a 12 year old fascinated by astronomy did I guess that I would be able to take deep-sky images from my own back garden in my lifetime!”
On clear Moonless evenings you’ll find me in the New Forest Observatory imaging deep-sky objects.
The Beginning
Life was fairly uneventful for me until I hit age 12 and my parents decided they wanted to take a look at New Zealand. I’d always been interested in astronomy (I think I got my first refractor for Christmas aged around eight) – but the trip to New Zealand really got the astronomy moving. Living in Takapuna on the East coast of the North Island I regularly spent the whole evening fishing from the lava rocks that had been thrown up by the volcano Rangitoto some three miles out in the bay [no, I didn’t attend much school]. Looking up into that completely dark night sky was a pretty awe inspiring experience, plus there was the added fun of all the stars I’d never seen before from the U.K.
Unfortunately the dream came to an end and my parents and I returned to the U.K. All, however, was not finished astronomy-wise. We ended up living in a village called Walkhampton within Dartmoor National Park. When the skies were clear, they were also completely free of light pollution – this was observer’s heaven! The view through an ordinary pair of 10 x 50 binoculars was unbelievable, and one night, camping out in the middle of Dartmoor one summer evening, I took a peek out of the tent at about 2.00 a.m. I have never seen such a perfect night sky (even in New Zealand!) before, or since.
Fun comes to an end at some point though, and you have to go out to work. I took an H.N.C. ((Higher National Certificate)) whilst working for the Culham Labs in Oxford, and received Distinctions in Applied Physics and Pure mathematics from Oxford Polytechnic [now Oxford Brookes University]. This set me up to take a degree in Physics, Maths and Astronomy at Sussex University [1975 – 1978] where I managed to scrape a First. This also put me off anything to do with Astronomy for about 5 years!”
I then went to work at Philips Research Labs, Redhill, Surrey and at the same time took a PhD at Surrey University which was awarded in 1982. I spent a total of 15 years in Industry [including 3 years in my University spin out company] and finally spent 23 years at a Russell Group University retiring in 2010.
Purchasing the Celestron Nexstar
At the beginning of 2002 I found myself in a situation I had never encountered before, I had some spare cash to buy myself a good quality telescope and I was living in an area that was half-reasonable (light pollution-wise) for some astronomy work. I plumped for the Celestron Nexstar 11″ GPS with Hyperstar attachment. I used this for visual work only [the Hyperstar remained untouched in its box] for two years, carrying the kit in and out of doors on any clear night. In November 2004 I bought my first CCD, a Starlight Xpress SXV-H9C which was a perfect match for the Hyperstar lens. All my initial images were taken with the fantastic Hyperstar working at an amazing f#1.85.
During 2005 I was invited to join the Our Dark Skies forum [U.S.A.] by Bud Guinn who I had met on the Starlight Xpress Yahoo forum. On the ODS forum I came across an image processing expert called Noel Carboni – and the rest as they say is history 🙂
The Takahashi Sky 90
From September 2006 until June 2008 I imaged with a Takahashi Sky 90 refractor at f#4.6 and a large format Starlight Xpress SXVF-M25C one-shot colour camera. The little Tak gave an amazing completely flat field across a massive 3.33 x 2.22 degrees field of view (FOV). Also, star shapes were good across the whole FOV [ something that wasn’t possible with the ultra-fast Hyperstar] – the only downside of the Tak was that it was 6 times slower than the Hyperstar system. However, the field of view with the Sky 90 and SXVF-M25C was actually 10 times greater than the Hyperstar/H9C combination – so overall, as far as total exposure time went, I was actually winning.
The Future and the mini-WASP array
My next major project is the New Forest Observatory mini-WASP array. But don’t hold your breath over this one – it’s going to take some time (and a lot of cash). The mini-WASP will use multiple refractors and CCD cameras [just like the super-WASP arrays] and it will need to go on a professional mount – almost certainly the Paramount ME [and have you seen the price of those!!]. Well that’s the dream anyway. Keep looking at this site to see the progress [or not] on the mini-WASP array. At the present time I have the telescope framework built, 2 Sky90s with reducer correctors, and a Megrez 80 guide scope. I have posted a picture of the framework on the NFO site.
The Hyperstar returns to the New Forest Observatory
I did all my Sky 90/SXVF-M25C imaging while on sabbatical, and towards the end of this break I was wondering how I was going to continue imaging as the Sky 90 required very long total exposure times for good results. I got lucky I guess. On returning full-time to the University I was soon sent out to Arizona to check out some semiconductor processing gear – Arizona of course means Starizona – and while I was out there Dean shipped a new version 3 Hyperstar and also the electronic microfocusser for the FeatherTouch focuser, to my hotel. Of course as soon as I landed back in the U.K. and returned home I removed the Sky 90 and replaced it with a very lightweight Celestron guide scope, also the secondary mirror was taken off the C11 and on went the new Hyperstar III. Since June 2008 I have been imaging with the Hyperstar III on the C11 and it really is a dream combination. The new Hyperstar III not only has collimation adjustment and camera rotation built in, it can also now easily handle the bigger SXVF-M25C chip. So in the short time I was away from Hyperstar imaging, Dean at Starizona had addressed all the problems that led me to stopping imaging with the original Hyperstar. Can the Hyperstar be improved even further? Yes it can. It cannot accommodate a full 35mm chip as the optics makes this physically impossible. But – it would be very nice to be able to place filters into the Hyperstar through a side entry slot rather than having to break into the imaging train each time. I believe Dean has a design solution to this one already worked out.
So -rather than the mini-WASP array being the next development at the NFO, it was in fact a return to Hyperstar imaging that was the next move. I have not given up on the mini-WASP array however and it is still being assembled, slowly. There is also something going on behind the scenes regarding the mini-WASP, and I’ll be able to let you know more about this in the coming months. That “something behind the scenes” was an application to the Arts Council for a grant to build the mini-WASP array. I didn’t get it 🙁
2010 and the mini-WASP project continues
Well I bought the Paramount ME towards the end of 2009, and I have the custom-built all Aluminium pier due to be delivered in the next few days. A custom designed and built adapter to fit an M26C camera to an f#4.5 reducer/corrector together with an integral filter holder has already been fitted to the Sky 90 refractors. So next things on the list are the concrete base for the pillar, the wooden decking surround and the fibreglass dome – these items are due to be crossed off the list by the end of May 2010. The aim is to get the basic mini-WASP array seeing first light by August 2010 ready for serious imaging during winter 2010.
2011 and the mini-WASP continuums (to quote Douglas Adams)
As I am now full-time running my Consultancy I actually have the time to think about getting the mini-WASP up and running. I made the mistake of going to AstroFest on 4th February 2011 and saw that the new 2.2 metre dome was ideal for the new array. So the beginning of 2011 will see another concrete block and decking installed in the garden ready to take the 2.2 metre dome. Then it will be a matter of installing the Paramount and the 4-telescope framework that is the basis of the mini-WASP.
2012 – 2013 – 2014 and the mini-WASP is completed in October 2014
Three years have disappeared in a flash! This month (October 2014) I have finalised the mini-WASP array with the addition of a third Sky 90. So the current configuration of the mini-WASP array, which will now remain unchanged for the foreseeable future is:
1) Sky 90(1), filter-wheel, IDAS, H-alpha, H-beta, OIII, SII, M26C OSC CCD, Robofocus.
2) Sky 90(2), filter-wheel, IDAS, H-alpha, H-beta, OIII, SII, M26C OSC CCD, Robofocus.
3) Sky 90(3), IDAS, M26C OSC CCD, Robofocus.
4) Canon EF200 f#2.8 prime lens, IDAS, M26C OSC.
5) Megrez80 guide scope, Starlight Xpress Lodestar guide camera.
First light for the 3 x Sky 90 system was the Barnard’s “E” region in Aquila. 15 x 15-minute subs using all 3 scopes. So 3 hours and 45-minutes worth of data taken in just 1 hour and 15-minutes of real time 🙂
The Hyperstar III in the south dome is once again fully operational and has the best collimation I have ever managed. For a few months this year the Hyperstar was out of commission as I experimented with the Canon 200mm lens piggy-backed on the C11. All experiments are now finished and the Hyperstar III is once again the imager of choice, together with the “old faithful” M25C OSC and Starlight Xpress guide camera. I used the Canon 200mm with both the M25C and a Canon 5D MkII DSLR. Both gave extremely impressive results.
As we enter winter 2014 I wonder if we are going to have the same weather as last year. From this time last year I had 6 months of cloudy evenings where I didn’t take a single deep-sky image! So there were no winter delight images from 2013 at all – very disappointing. We’ll have to see how 2014 pans out, but so far it isn’t looking promising, let’s hope for some clear Moonless evenings so that I can give the mini-WASP array a really good work out.
2014 – 2021
Happy days imaging with the mini-WASP array and the Hyperstar III. The Hyperstar III is now coupled to a Starlight Xpress Trius 814C one shot colour CCD, and I must say that this camera is a PERFECT match for the Hyperstar III on the Celestron Nexstar GPS 11″ SCT.
The two 200mm lenses on the mini-WASP array are ideal for wide-field images of star fields and I have had great fun getting some superb deep-sky images with them over the last few years. My best effort to-date is a 3-frame mosaic of the North America/Pelican nebula region.
The three Sky90s on the mini-WASP array give me 3x the exposure time for actual imaging time taken – that really is the power of this array. So even when I go up to stupidly long subs, like 1-hour which I did for the Pleiades, I can still get 3 subs for that 1-hour of actual imaging time. I suppose it says something about the superb Paramount ME that I can take 1-hour long sub-exposures without any sign of star trailing.
2020 was pretty much a write-off as far as imaging went, not only because of the weather, but also the Coronavirus pandemic rather took the edge off things. But as I write this particular entry in August 2021 I feel re-energised for the new season. We are beginning to get a few hours of darkness back once again and the next clear Moonless night I will be out again capturing photons. Here’s hoping for some decent imaging weather in the coming 9 months.
It is September 10th 2021 and a few nights back I took the first image of the new season with the Hyperstar III. Only 6 x 3-minute subs on the Pelican’s head, but it is a start. This was followed by 4-hours of good imaging time the next day sorting out all the Gremlins on the Mini WASP array, followed by the whole of the next day taken up fixing software issues. However, the array seems to now be behaving itself once again, so next clear night I hope to get some Sky90 images sorted out.
August 2021 – June 2022
Not quite a full year has passed, but there has been a lot going on at the New Forest Observatory. First off, the two belt-driven focusers for the 2 x 200mm Canon prime lenses have been removed – and replaced by the most amazing lens controllers made by Astromechanics. These lens controllers go between the Canon lens and the imaging camera and they are ASCOM controlled. A USB input allows the lens controller to talk to the computer which in turn means easy connection to programs such as FocusMax for quick and easy focusing of the Canon lens to a suitable star. Focusing is now extremely fast and totally pain-free. It has completely revolutionised my wide field imaging with the Canon 200mm lenses. Another change, also on the Canon lenses, I removed the 2 x Trius M26C OSC CCDs and replaced them with ZWO ASI2600MC-Pro CMOS cameras. Now, because I am a Dinosaur and worked with CCD imagers back in the early 80s, I thought that these new-fangled CMOS cameras were not up to the job compared to their CCD cousins. I couldn’t have been more wrong. The CMOS cameras are EXTREMELY low noise and so don’t require a great deal of cooling, the pixels are very small which is perfect for the Hyperstar and short focal length lenses, and (on my cameras at least) there seem to be virtually no hot pixels. Add to that a blisteringly fast read out time for 26Mb of data and you can see I have a game-changer on my hands. It has also propelled me (unwillingly) into the world of BIG DATA as a 26Mb chip means big FITS files which in turn means several Gigs of storage for a typical image – but it’s all worth it 🙂
The other big change is to the Hyperstar rig. Dean at Starizona sent me the new Hyperstar 4 AND an ASI 2600MC-Pro camera to use on it – that’s where I came across the power of this camera for the first time and decided to put it on the Canon lenses. The Hyperstar 4 is proving to be quite a beast combined with the 2600MC-Pro but the HUGE improvement I have found with the Hyperstar 4 is the total lack of light flaring from bright stars! Well done Starizona – that is a great improvement in the design. Huge bonus image of the year from the Hyperstar was the supernova SN2022hrs in galaxy NGC4647!
Finally, on December 21st I once again set up the solar pinhole camera to track the Sun’s path across the sky until Summer Solstice at June 21st – just a couple of weeks away now.
So there have been plenty of developments over this last year and once we are out of this period of zero hours of darkness, I once again hope to be bringing you more deep-sky goodies.
October 2022
With over 6 months of testing I can now report that the ASI2600MC Pro camera on the Hyperstar 4 (on a C11) is a killer combo! If you get good collimation you are rewarded with nice round stars right into the corners of an APS-C size chip, that really is quite some achievement at f#2, well done Starizona! Add to that the complete lack of ghost flaring from bright stars and I would say that Starizona have got themselves a real winner with this one. I am now praying for some decent skies this winter so I can really get the Hyperstar 4 showing its colours and push it to its (and my) limits.
The Canon 200mm lenses with the Astromechanics lens controllers and the ASI2600MC Pro CMOS cameras have also improved things by an order of magnitude. I now have a sampling of 3.88 arcseconds per pixel, whereas the Trius M26C cameras were giving me 6.13 arcseconds per pixel. The much better sampling, together with the lower noise, unfortunately means I am probably going to have to redo all those 200mm lens images I took with the M26Cs. Oh well, there are worse problems to have.
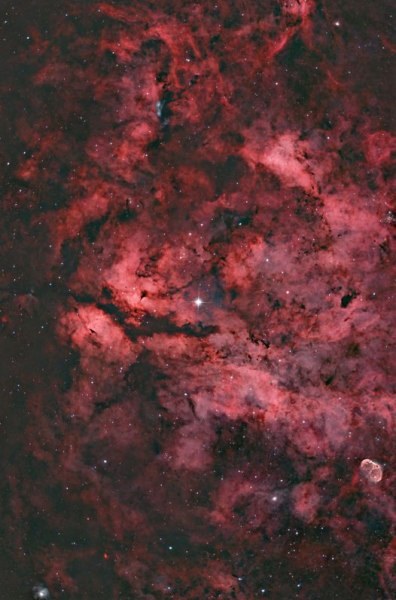
In just the past couple of weeks I have gone through most of my old images going right back to near the beginning in an attempt to work out what’s been going on with my imaging all these years. I was quite surprised that over last weekend I finally understood what’s been going on and how all the numbers actually hang together and make absolute sense. What does this mean practically? Well I think you are about to see an order of magnitude improvement in the images I turn out as from now. The first big improvement you will see is with the Altair/Barnard’s “E” image I recently posted. Only 10-minute subs on the 200mm lenses, but those 2600MC Pro cameras added into the mix really push up the image quality considerably. So all we need now are those clear Moonless skies, something that has been sadly missing from Brockenhurst for the past several years. Fingers crossed for this year! You might look at the “Sadr region in Cygnus” image and say, well that doesn’t look like an order of magnitude improvement – and you’d be right! BUT – I now know why there isn’t a order of magnitude improvement with that one, and I know how to sort it out. Sorry, but how I will sort it out I will keep to myself just for now, but I can say that it will also greatly improve that IC410/IC405 image I took recently as well. That IC410/IC405 image was 76 x 15-minute subs and I must admit I was expecting a real cracker of an image at the end of that imaging marathon. It was nice, but for what I was expecting it was a huge disappointment. But now at least I know what the missing ingredient is with that one, and I shall rectify it the next time Auriga is positioned well in my night sky.
September 2023
As nearly a year has gone since the last entry, I guess it’s time for an update.
The expected improvement I calculated I would get in my images can now be seen with the Sadr image (September 10th 2023) you can see on this site. Hopefully, in future, all 200mm lens images will see this improvement, but as I said earlier, the negative outcome of this is that I am going to have to redo all the 200mm lens/M26C OSC CCD images that I took before – annoying! I did redo an earlier image of Altair and Barnard’s “E”, and there was a good improvement.
I am (next clear sky) going to try a new imaging experiment. I have put an Optolong L-Enhance filter on the Hyperstar. Now I have no idea if this filter will work at f#2, but as a test I will try it out on the Soap Bubble nebula (near the Crescent nebula) and see if it works. If it does, I should also see an order of magnitude improvement in my Hyperstar imaging.
There have been no configuration changes, or any equipment upgrades in the last year, so the array and the Hyperstar are just as reported last time.
Surprisingly there has been a major development on the processing front. Russ Croman has brought out an utterly superb program called Star Xterminator, and Noel Carboni created a plug-in for it to control the amount of star reduction. Star reduction on images containing a lot of nebulosity completely transforms them, and below are a couple of examples.
And so, until next year, clear skies and happy imaging!
I can report that the Optolong L-Enhance filter is not effective at f#2, and neither it seems is the Optolong L-Extreme filter. So the straight UV/IR filter it is then.

