
A zoom in/zoom out image of the M101 galaxy region in Ursa Major.
A zoom in/zoom out image of the M101 galaxy region in Ursa Major.

A mere 57-years separates the era of the Pepper Ginders (the 3 Curta calculators) from the Trashcan (the 2013 Mac Pro).
WordPress seem to have changed the spam detection options meaning that I now get hundreds of (mainly Russian) spam posts as comments on my posts – per day.
This extremely boring situation means that I now do not have a “Comments” option on my posts – sorry for that.

A zoom in/zoom out of the Veil nebula in Cygnus.

A zoom in/zoom out image of the M44 region.


Bit late this year cleaning off all the dirt, grime and pollen from the domes. Usually complete this job April/May.
Here, sparkling in this blazing heat are the north dome (Micro-Dragonfly Array) with the side pods, and the south dome (Hyperstar on the Celestron Nexstar 11″ GPS SCT).

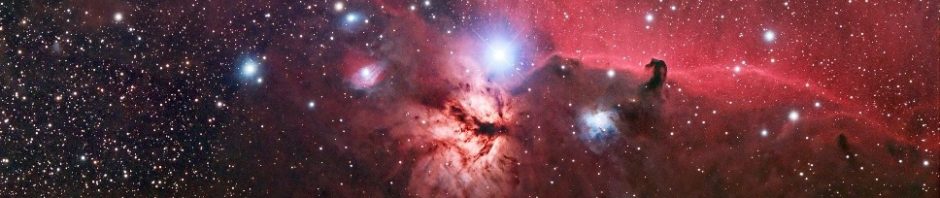
A zoom in/zoom out image of the M78 region. On the zoom out you can see a section of Barnard’s Loop (the red H-alpha band).

A zoom in/zoom out image of the beautiful Double Cluster in Perseus.

Winter Solstice 2025 until Summer Solstice 2026 solargraph. You can just make out the two white fibreglass domes in the foreground.

A zoom in/zoom out image of the Coma Cluster of galaxies.
