
The Hyperstar is in my opinion a totally brilliant Celestron concept and an extremely brave move on their part as they would have known about the considerable problems with properly aligning the lens assembly, and the potential customer dissatisfaction with the product.
The Hyperstar is basically a 1x field-flattener lens assembly that takes the place of the secondary mirror in a standard Schmidt-Cassegrain telescope. Your CCD imager sits on the end of the Hyperstar and this creates a very strange looking beast indeed. I must admit, I fell in love with this thing before I even started Hyperstar imaging; this looked so extreme and really piqued my curiosity.
Since you now have your imager at the secondary mirror position, it is clear that the focal length you are working at is very much reduced, the light does not now go all the way up to the secondary mirror, and then all the way back down the telescope again to come out at the normal eyepiece position. So the Hyperstar basically turns a very slow f#10 optical system into an unbelievably fast f#1.85 astrograph – an incredibly good idea.
By making the optical system so fast, your sub-exposure times come right down, I never used subs longer than two minutes with the Hyperstar (those were the days!) – and that’s with a Hutech IDAS LP filter in the optical train. In addition, the short focal length also gives you a good field of view so you are able to capture large objects reasonably well.
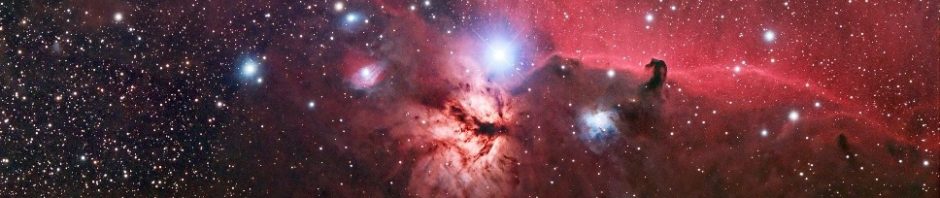
For the C11/Hyperstar/SXV-H9C combination, my field of view was about 1 degree by three-quarters of a degree, which was ideal for a large number of deep-sky objects.
When it came to buying the Hyperstar for the C11 I came up against a problem – it appears that Celestron never made a Hyperstar for the C11, in fact the Celestron device used to be called a Fastar, and it was only ever made (by Celestron) for the C8. I found out that I could buy the Hyperstar for the C11 from a company called Starizona in the States, and this I did – fortunately the transaction all worked out very smoothly. At the same time I also bought a FeatherTouch focuser for the C11 from the same company.
I didn’t actually start imaging for something like 2 years after I bought the Hyperstar, so during this time it sat in my “bottom drawer” totally unused. However, I had gotten a bit frustrated with visual work with the C11 and wanted to go much deeper in my observations – I needed to start imaging. The first problem was what CCD to choose.
Back in 2004 when I was making these decisions I had no idea about the best CCD to use with the C11 Hyperstar and I relied on Terry Platt at Starlight Xpress and Dean at Starizona to tell me the best one to choose out of those I was considering.
My interest then (as it is now) was just to take “pretty pictures” in the shortest time possible – so I knew I wanted a one-shot colour CCD. I didn’t know whether I needed the large format 6-megapixel SXV-M25C (there was no SXVF then) or the SXV-H9C coming in at 1.4 megapixels. Both Dean and Terry said the H9C would be a better match to the Hyperstar as its imaging circle was only about 20mm and the M25C was therefore far too big for it. Subsequently I found out they were both absolutely right, and the H9C is almost tailormade for the C11 Hyperstar.

|

|
At such short focal lengths and tiny f-numbers you find your critical focus zone is something like 7 microns, keep in mind a human hair has a diameter of something like 80 microns! So, not only is focusing critical (this is why I bought the FeatherTouch focuser!), but also the positioning of the Hyperstar.
Now ,I had an earlier model of Hyperstar lens, without any adjusters, so I had to make up some adjuster rods to physically move the Hyperstar within the corrector plate (there was about 1mm of free movement around the outside of the secondary mirror housing). This 1mm of movement allowed me to perfectly collimate the Hyperstar with the result that I managed to get perfectly round stars over nearly the entire field of view.
If my collimation was spot-on I could get good round stars corner to corner, but it was normal for me to see a little coma in the far corners of the image as it was extremely difficult to achieve perfect collimation. At the time I was doing this work nobody else was getting nice round stars out of a Hyperstar system, and many people on the forums suggested that the Hyperstar could not take good quality deep-space images at all!
Hyperstar imaging is a dream. With such short sub-exposure times you can get away with a mediocre quality mount, and a typical imaging session should yield you 100 or more subs guaranteeing a superbly smooth image at the end of you processing.
So if the Hyperstar is so good why have I moved on to using a Sky 90 refractor and an SXVF-M25C camera?

Secondly, I wanted a bigger CCD camera and a bigger field of view for my deep-sky imaging work, and the Hyperstar couldn’t take a bigger CCD camera (on the C11). So I made an abrupt change in the way I image deep-sky objects, and I pay the price of this change with much longer sub-exposure times – but strangely enough I don’t lose out overall!
In moving from f#1.85 to f#4.5 imaging, my sub-exposure times (and total exposure times) have all increased by a factor of 6. So whereas only 2 hours total imaging time on an object with the Hyperstar guaranteed a good image, this now becomes a 12-hour total imaging time with the Sky90/M25C, or 2-3 nights of good imaging!
With the Hyperstar I could get 2-3 objects in a single night!! However, the total field of view (FOV) of the Sky 90/M25C is actually 10x (in area) the FOV of the C11/Hyperstar, in other words I would need to make a 10-frame mosaic using the C11/Hyperstar to get the single frame equivalent of the Sky90/M25C.
This equates to a total imaging time of 20 hours using the C11/Hyperstar compared with the 12 hours of the Sky90/M25C, so overall, I win! 🙂
POSTSCRIPT: It has been so long since I have imaged using the Hyperstar that I’ve actually already forgotten some of the other “tricks” I used to get the images I did out of the thing. I have just been reminded by a UKAI forum friend that I always used a Hutech IDAS LP filter wedged between the Hyperstar and the SXV-H9C and that this filter did a lot more than just cut down the light pollution! Without some form of infrared blocking filter (the IDAS does this for you as a free bonus) you will get very bad star bloating in your Hyperstar imaging. Any filter that cuts out the near infrared will also cut out your star bloat and you MUST have an IR blocking filter in your Hyperstar imaging train if you want to acquire good image data.
